Bean的定义与生命周期管理
学习目标:
- 学习如何使用 XML 配置、注解(如@Component, @Autowired, @Value等)以及Java配置类来定义Bean和管理依赖关系。
- 理解Spring容器的工作原理,包括Bean的生命周期管理,如Bean的初始化、销毁回调方法等。
一、Bean的定义与管理
1.1 什么是Bean?
Bean是Spring管理的Java对象。
比如 服务“类”、数据访问对象(DAO)、控制器等,它们由Spring框架自动实例化、装配(即注入依赖)和管理其生命周期。
通过依赖注入(DI)和面向切面编程(AOP)等机制,Spring让这些Bean能够轻松地协同工作,降低了组件之间的耦合度,提升了代码的可测试性和可维护性。
在Spring框架中,定义和管理Bean及其依赖关系可以通过三种主要方式实现:
- XML配置
- 注解配置
- Java配置类
1.2 XML 配置
1.2.1 专业讲解
在Spring框架中,XML配置是一种经典的配置方式,用于定义应用程序组件(Bean)及其相互依赖。
它通过.xml文件来描述Bean的实例化细节,包括Bean的类名、属性设置、构造函数参数、依赖的其他Bean等。
开发者通过 <bean> 标签定义每个Bean,并使用属性和子元素来配置Bean的属性和依赖关系。
Spring容器负责解析这些配置,在运行时管理Bean的生命周期,包括创建、初始化、装配和销毁。
1.2.2 通俗讲解
想象你正在为一个大型晚宴做准备,XML配置就像是晚宴的详细菜单和采购计划。每一道菜(Bean)都被清楚地列出,包括需要的食材(属性)和其他菜品的搭配(依赖)。你把这张菜单交给厨房经理(Spring容器),它负责按照菜单上的说明准备食材、组合菜品,确保每道菜在上桌前都准备妥当,而且宴会结束后还会清理厨房。
1.2.3 开发实际场景举例
假设我们要构建一个简单的电子商务应用,其中有一个 ProductService 需要与 ProductDAO 交互来处理商品信息。
XML配置示例:
<beans xmlns="http://www.springframework.org/schema/beans"
       xmlns:xsi="http://www.w3.org/2001/XMLSchema-instance"
       xsi:schemaLocation="http://www.springframework.org/schema/beans
       http://www.springframework.org/schema/beans/spring-beans.xsd">

    <!-- 定义ProductDAO Bean -->
    <bean id="productDAO" class="com.example.ProductDAO"/>

    <!-- 定义ProductService Bean,并注入ProductDAO的依赖 -->
    <bean id="productService" class="com.example.ProductService">
        <property name="productDAO" ref="productDAO"/>
    </bean>
</beans>在这个场景中,ProductService 和 ProductDAO 是我们的两个组件(Bean),通过XML配置,我们告诉Spring容器如何创建它们以及它们之间的依赖关系。
ProductDAO.java可能是一个接口或抽象类,定义了与数据库交互的方法。ProductService.java实现业务逻辑,需要依赖ProductDAO来执行数据库操作。
通过上述XML配置,Spring容器会在应用启动时自动创建 ProductDAO 和 ProductService 的实例,并将 ProductDAO 的实例注入到 ProductService 中,实现了依赖的自动管理,简化了代码的编写和维护。
1.2.4 简易代码演示
创建一个使用Spring框架通过XML配置Bean的最小项目,我们将遵循以下基本步骤:
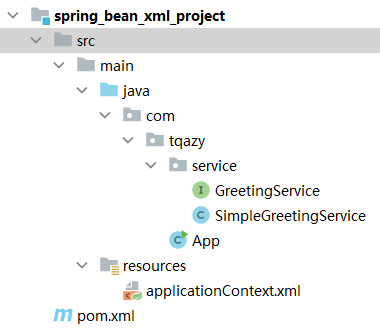
(项目结构图)
步骤 1: 创建Maven项目
首先,确保你有Maven环境安装,并使用IDE(如IntelliJ IDEA或Eclipse)创建一个新的Maven项目。
步骤 2: 添加Spring依赖
编辑pom.xml文件,添加Spring框架的核心依赖:
<dependencies>
    <dependency>
        <groupId>org.springframework</groupId>
        <artifactId>spring-context</artifactId>
        <version>5.3.23</version>
    </dependency>
</dependencies>
步骤 3: 创建Java类
接下来,创建两个简单的Java类,一个是服务接口,一个是它的实现类。
GreetingService.java(服务接口):
package com.tqazy.service;

public interface GreetingService {
    void sayHello();
}SimpleGreetingService.java(服务实现类):
package com.tqazy.service;

public class SimpleGreetingService implements GreetingService {
    @Override
    public void sayHello() {
        System.out.println("Hello, Spring!");
    }
}
步骤 4: 创建Spring配置文件
在 src/main/resources 目录下创建一个名为 applicationContext.xml 的文件,用来配置Bean:
<?xml version="1.0" encoding="UTF-8"?>
<beans xmlns="http://www.springframework.org/schema/beans"
       xmlns:xsi="http://www.w3.org/2001/XMLSchema-instance"
       xsi:schemaLocation="http://www.springframework.org/schema/beans
       http://www.springframework.org/schema/beans/spring-beans.xsd">

    <bean id="greetingService" class="com.tqazy.service.SimpleGreetingService"/>

</beans>
步骤 5: 主程序启动Spring容器并使用Bean
最后,创建一个主类来启动Spring容器,并从容器中获取并使用Bean。
App.java
package com.tqazy;
import com.tqazy.service.GreetingService;
import org.springframework.context.ApplicationContext;
import org.springframework.context.support.ClassPathXmlApplicationContext;
public class App {
public static void main(String[] args) {
ApplicationContext context = new ClassPathXmlApplicationContext("applicationContext.xml");
GreetingService greetingService = context.getBean("greetingService", GreetingService.class);
greetingService.sayHello();
}
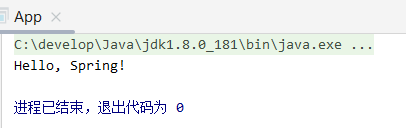
}步骤 6: 运行项目
现在,运行 App.java 的 main 方法。你会看到输出 “Hello, Spring!” ,表明Spring成功创建了Bean并调用了它的方法。
注意:这里的 com.tqazy 应替换为你实际的包名。此外,根据你的IDE和Maven配置,可能需要稍作调整,比如确保资源文件被正确识别和加载。
1.3 注解配置
1.3.1 专业讲解
注解配置是Spring框架提供的一种现代、简洁的配置方式,用于声明式地定义Bean和管理它们的依赖关系。
主要涉及的注解包括:
想了解这3个注解的具体信息,可以点击下面注解名称或者在本站搜索,有详细文章介绍
@Component:这是一个通用的注解,用于标记一个Java类为Spring中的Bean组件。Spring通过扫描特定包路径下的所有带有此注解的类,自动将它们注册为Bean。@Autowired:此注解实现依赖注入,允许Spring自动将匹配的Bean注入到需要它们的字段或方法中。Spring通过类型匹配来决定哪个Bean应该被注入。@Value:用于注入基本类型和String类型的值,可以从属性文件或其他配置源中读取这些值。
1.3.2 通俗讲解
想象你正在组织一场派对,每个人或物品(Bean)都有特定的角色(服务)。
@Component就像是给每个人或物品发放的标牌,标明他们属于这场派对的工作人员或物品,比如厨师、服务员、DJ、派对指定烤箱等。Spring通过查看谁佩戴了标牌,就知道他们是派对的一部分,应该进入会场。@Autowired好比是自动匹配任务的能力。一旦确定了某个人(如厨师)的角色,Spring就会自动找到他需要的工具(如烤箱、刀具、服务员,即其他Bean),而不用他自己去寻找。厨师只需要专注于烹饪,无需担心工具从哪里来。@Value则是给这些工作人员分配具体的任务指令。比如给DJ的指令可能是"播放摇滚音乐",这个指令可以直接从派对规划书(配置文件)中读取。
1.3.3 开发实际场景举例
假设你正在开发一个简单的博客系统,包含文章类Article和文章服务类ArticleService。
注解配置示例:
// 使用@Component标记为Spring管理的Bean
@Component
public class Article {
    // 文章内容
    private String content;
    // 省略getter和setter
}

@Service
public class ArticleService {
    // 使用@Autowired自动注入Article的依赖
    @Autowired
    private Article article;

    // 业务逻辑方法
    public void publishArticle() {
        // 省略具体实现
    }

    // 从配置文件中注入值
    @Value("${article.author}")
    private String author;
}在这个例子中,Article 和 ArticleService 通过 @Component 和 @Service 注解成为了Spring管理的Bean。ArticleService 类中的 article 字段通过 @Autowired 自动注入了 Article 的实例,而 author 字段则通过 @Value 从外部配置(如 application.properties )中读取了博客作者的名字。
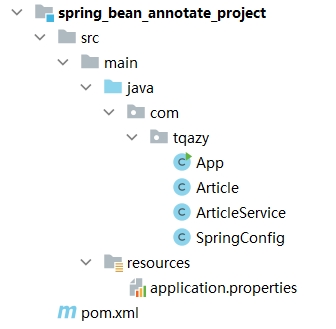
1.3.4 简易代码演示
步骤 1: 创建Maven项目
1、打开IDE(如IntelliJ IDEA或Eclipse),创建一个新的Maven项目。
2、在项目的pom.xml中添加Spring框架的依赖:
<dependencies>
    <!-- Spring Core and Context -->
    <dependency>
        <groupId>org.springframework</groupId>
        <artifactId>spring-context</artifactId>
        <version>5.3.23</version>
    </dependency>
    <!-- Spring AOP for @Configurable support -->
    <dependency>
        <groupId>org.springframework</groupId>
        <artifactId>spring-aop</artifactId>
        <version>5.3.23</version>
    </dependency>
</dependencies>
步骤 2: 创建Article和ArticleService类
Article.java
package com.tqazy;

import org.springframework.stereotype.Component;

@Component
public class Article {
    private String content;

    public Article() {
        this.content = "这是文章类的构造器添加的测试内容。";
    }

    public String getContent() {
        return content;
    }

    public void setContent(String content) {
        this.content = content;
    }
}
ArticleService.java
package com.tqazy;

import org.springframework.beans.factory.annotation.Autowired;
import org.springframework.stereotype.Service;
import org.springframework.beans.factory.annotation.Value;

@Service
public class ArticleService {
    private final Article article;
    private String author;

    @Autowired
    public ArticleService(Article article) {
        this.article = article;
    }

    @Value("${article.author}")
    public void setAuthor(String author) {
        this.author = author;
    }

    public void publishArticle() {
        System.out.println("文章作者:" + author + ",文章内容:" + article.getContent());
    }
}
步骤 3: 创建Spring配置类
因为没有使用Spring Boot,我们需要一个配置类来代替自动配置的功能。
创建SpringConfig.java:
package com.tqazy;

import org.springframework.context.annotation.Bean;
import org.springframework.context.annotation.ComponentScan;
import org.springframework.context.annotation.Configuration;
import org.springframework.context.annotation.PropertySource;

@Configuration
@ComponentScan(basePackages = "com.tqazy")
@PropertySource("classpath:application.properties")
public class SpringConfig {

    // 如果需要,可以在这里通过@Bean手动定义Bean,但因为我们使用@Component等注解,所以这里可以省略
}
步骤 4: 添加属性文件
在 src/main/resources 目录下创建 application.properties。
article.author=tqazy步骤 5: 主函数及运行
创建主函数以手动启动Spring上下文,并从中获取Bean进行测试。
创建App.java:
package com.tqazy;

import org.springframework.context.ApplicationContext;
import org.springframework.context.annotation.AnnotationConfigApplicationContext;

public class App {
    public static void main(String[] args) {
        ApplicationContext context = new AnnotationConfigApplicationContext(SpringConfig.class);
        ArticleService articleService = context.getBean(ArticleService.class);
        articleService.publishArticle();
    }
}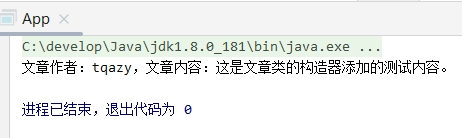
这个项目中,不用关注配置类什么的,只需要关注3个注解的使用。
1.4 Java配置类
1.4.1 专业讲解
Java配置类是Spring框架提供的另一种配置方式,它使用Java类而非XML文件来定义和管理Bean及其依赖关系。
这种方式更加灵活,支持复杂的逻辑和条件配置,并且与Java生态系统更加自然地集成。
Java配置类通过使用 @Configuration 、@Bean 等注解来实现:
@Configuration注解标记一个类作为配置类,该类可以包含一个或多个@Bean方法。@Bean注解在一个方法上,表示该方法返回的对象应该被注册为一个Spring管理的Bean,可以指定Bean的名称、初始化方法、销毁方法等。
1.4.2 通俗讲解
想象你正在规划一个生日派对,而Java配置类就像是派对策划师,它通过一系列指令(方法)来告诉系统(厨房、装饰团队等)需要准备什么(Bean)以及如何准备(依赖关系)。
@Configuration 就像是给派对策划师的认证,表明这个人(类)有权制定派对的所有安排。
@Bean 方法就像是策划师说:“我们需要一个生日蛋糕,做法是这样的…”,每当这样的方法被执行,就相当于制作了一份特别的物品(Bean),并且系统会记住这份物品的制作方法和成品,供后续使用。
1.4.3 开发实际场景举例
假设你正在开发一个用户认证模块,需要配置用户服务层类 UserService 和用户持久层类 UserRepository。
// Java配置类示例
import com.example.repository.UserRepository;
import com.example.service.UserService;
import org.springframework.context.annotation.Bean;
import org.springframework.context.annotation.Configuration;

@Configuration
public class AppConfig {

    // 模拟数据库连接配置,实际中可能来自外部配置源
    private final String databaseUrl = "jdbc:mysql://localhost:3306/mydb";

    // 定义UserRepository Bean
    @Bean
    public UserRepository userRepository() {
        // 假设这里是创建并初始化UserRepository实例的逻辑,可能包括数据库连接等
        return new UserRepository(databaseUrl);
    }

    // 定义UserService Bean,并注入UserRepository依赖
    @Bean
    public UserService userService(UserRepository userRepository) {
        // 创建UserService实例时,自动注入UserRepository
        return new UserService(userRepository);
    }
}在这个例子中,AppConfig 类被 @Configuration 注解标记为配置类。
userRepository() 和 userService() 方法分别定义了两个Bean,其中 userService() 方法的参数 userRepository 由Spring自动注入,体现了依赖关系的管理。
这种方式使得配置更加类型安全,易于理解和维护,尤其是当项目复杂度上升时,Java配置的优势更为明显。
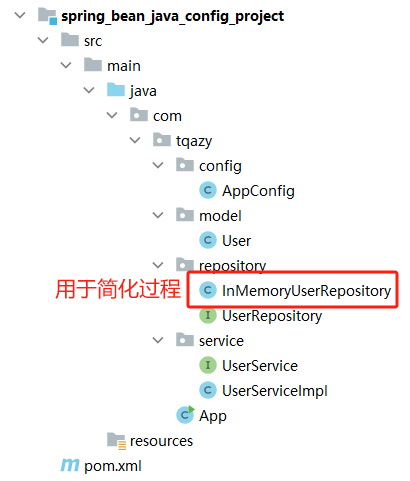
1.4.4 简易代码演示
步骤1:创建Maven项目并配置Spring
1、创建Maven项目:
使用IDE(如IntelliJ IDEA或Eclipse)创建一个新的Maven项目。
2、配置pom.xml:
在pom.xml中添加Spring核心库的依赖:
<dependencies>
    <dependency>
        <groupId>org.springframework</groupId>
        <artifactId>spring-context</artifactId>
        <version>5.3.23</version>
    </dependency>
    <dependency>
        <groupId>org.springframework</groupId>
        <artifactId>spring-core</artifactId>
        <version>5.3.23</version>
    </dependency>
</dependencies>
步骤2:创建User模型、持久层(简易实现)和业务服务层及实现
1、User.java(用户实体):
package com.tqazy.model;

public class User {
    private String username;
    private String password;

    public User() {
    }

    public User(String username, String password) {
        this.username = username;
        this.password = password;
    }
    // get、set方法省略
}2、UserRepository.java(用户仓库接口):
package com.tqazy.repository;

import com.tqazy.model.User;

public interface UserRepository {
    User findByUsername(String username);
}3、InMemoryUserRepository.java(内存中的用户仓库实现,仅用于演示):
package com.tqazy.repository;

import com.tqazy.model.User;

public class InMemoryUserRepository implements UserRepository {

    public InMemoryUserRepository(String databaseUrl) {
        System.out.println("databaseUrl=" + databaseUrl);
    }

    @Override
    public User findByUsername(String username) {
        // 简化示例,实际应从数据库查询
        if ("testUser".equals(username)) {
            return new User("testUser", "password");
        }
        return null;
    }
}4、UserService.java(用户服务接口):
package com.tqazy.service;

import com.tqazy.model.User;

public interface UserService {
    User authenticate(String username, String password);
}5、UserServiceImpl.java(用户服务实现):
package com.tqazy.service;

import com.tqazy.model.User;
import com.tqazy.repository.UserRepository;

public class UserServiceImpl implements UserService {
    private final UserRepository userRepository;

    public UserServiceImpl(UserRepository userRepository) {
        this.userRepository = userRepository;
    }

    @Override
    public User authenticate(String username, String password) {
        User user = userRepository.findByUsername(username);
        if (user != null && user.getPassword().equals(password)) {
            return user;
        }
        return null;
    }
}
步骤3:创建Spring配置类
AppConfig.java
package com.tqazy.config;
import com.tqazy.repository.InMemoryUserRepository;
import com.tqazy.repository.UserRepository;
import com.tqazy.service.UserService;
import com.tqazy.service.UserServiceImpl;
import org.springframework.context.annotation.Bean;
import org.springframework.context.annotation.Configuration;
@Configuration
public class AppConfig {
// 模拟从外部配置获取的数据库连接信息,实际项目中使用@Value读取配置文件
private static final String DATABASE_URL = "jdbc:mysql://localhost:3306/mydb";
// 示例中使用内存中的用户仓库,但配置方式展示了如何向构造函数传参
@Bean
public UserRepository userRepository() {
// 实际项目中,您可能会创建DataSource并传递给真正的Repository实现
return new InMemoryUserRepository(DATABASE_URL);
}
// 定义UserService Bean,使用构造器注入UserRepository
@Bean
public UserService userService(UserRepository userRepository) {
return new UserServiceImpl(userRepository);
}
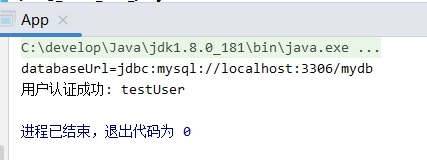
}步骤4:编写主函数
App.java
package com.tqazy;

import com.tqazy.config.AppConfig;
import com.tqazy.model.User;
import com.tqazy.service.UserService;
import org.springframework.context.ApplicationContext;
import org.springframework.context.annotation.AnnotationConfigApplicationContext;

public class App {
    public static void main(String[] args) {
        ApplicationContext context = new AnnotationConfigApplicationContext(AppConfig.class);
        UserService userService = context.getBean(UserService.class);

        User authenticatedUser = userService.authenticate("testUser", "password");
        if (authenticatedUser != null) {
            System.out.println("用户认证成功: " + authenticatedUser.getUsername());
        } else {
            System.out.println("认证失败。");
        }
    }
}
步骤5:启动并运行App类的main方法
二、Spring容器的工作原理
2.1 专业讲解
Spring容器是Spring框架的核心,负责管理和组织Bean的生命周期。
它通过读取配置(XML、注解、Java配置类)来创建Bean实例,管理它们之间的依赖关系,并提供必要的服务,如资源管理、事务管理等。
Spring容器的工作流程大致分为Bean定义的载入、Bean实例化、依赖注入、初始化、使用、销毁几个阶段。
Bean的生命周期管理包括:
- Bean定义载入: Spring容器从配置源(如XML文件、注解、Java配置类)读取Bean定义信息。
- Bean实例化: 根据Bean定义,Spring使用反射机制创建Bean实例。
- 依赖注入: 容器遍历Bean定义中的依赖关系,通过属性填充或构造器注入等方式,将其他Bean实例注入到当前Bean中。
- 初始化: Bean实例创建后,会调用自定义的初始化方法(通过
@PostConstruct注解或InitializingBean接口指定),进行额外的初始化操作。 - 使用: Bean已准备好并可被应用程序代码使用。
- 销毁回调: 当容器关闭或Bean不再需要时,会调用预定义的销毁方法(通过
@PreDestroy注解或DisposableBean接口指定),执行清理操作。
2.2 通俗讲解
想象Spring容器是一个高级管家,负责照顾你家里(应用)的各种物品(Bean)。
- Bean定义载入: 就像管家先查看清单(配置文件),了解家里需要哪些物品,它们放在哪里,有什么特性。
- Bean实例化: 接着,管家根据清单购置物品,摆放到对应位置(内存中)。
- 依赖注入: 如果某个物品需要搭配其他物品使用(依赖关系),管家会自动将它们放在一起。比如将电池放在手电筒中。
- 初始化: 对于一些需要组装或特殊准备的物品,管家还会进行额外的安装和调试。
- 使用: 一切就绪后,家庭成员(应用代码)就可以直接使用这些物品了。
- 销毁回调: 当某物品不再需要或搬家(应用关闭)时,管家会负责妥善处理这些物品,比如拆卸、回收。
2.3 开发实际场景举例
假设有一个简单的Web应用,包含一个 UserService 类,它依赖于 UserRepository 来操作数据库。
@Service
public class UserService {
    // 业务方法:模拟业务
    public void findUserById(Long id) {
        System.out.println("找到根据" + id +"找到用户了");
    }

    // 初始化回调方法
    @PostConstruct
    public void init() {
        System.out.println("UserService 初始化完成");
    }

    // 销毁回调方法
    @PreDestroy
    public void destroy() {
        System.out.println("UserService 正在销毁");
    }
}在这个例子中,UserService 类通过构造器注入的方式依赖于 UserRepository 。
同时定义了 @PostConstruct 和 @PreDestroy 注解的方法,分别表示Bean的初始化和销毁回调。
2.4 简易代码演示
基于上面的 UserService.java,创建一个简单的maven+spring程序,调用 UserService.java 的 findUserById 方法。运行结果如下:
传参id为1:


陶总 666👍
客气了,李总,向李总学习٩(ˊᗜˋ*)و